Nailqo original · AI-generated inspiration concept
THE NAILQO COLLECTION
Lavender at the edge.
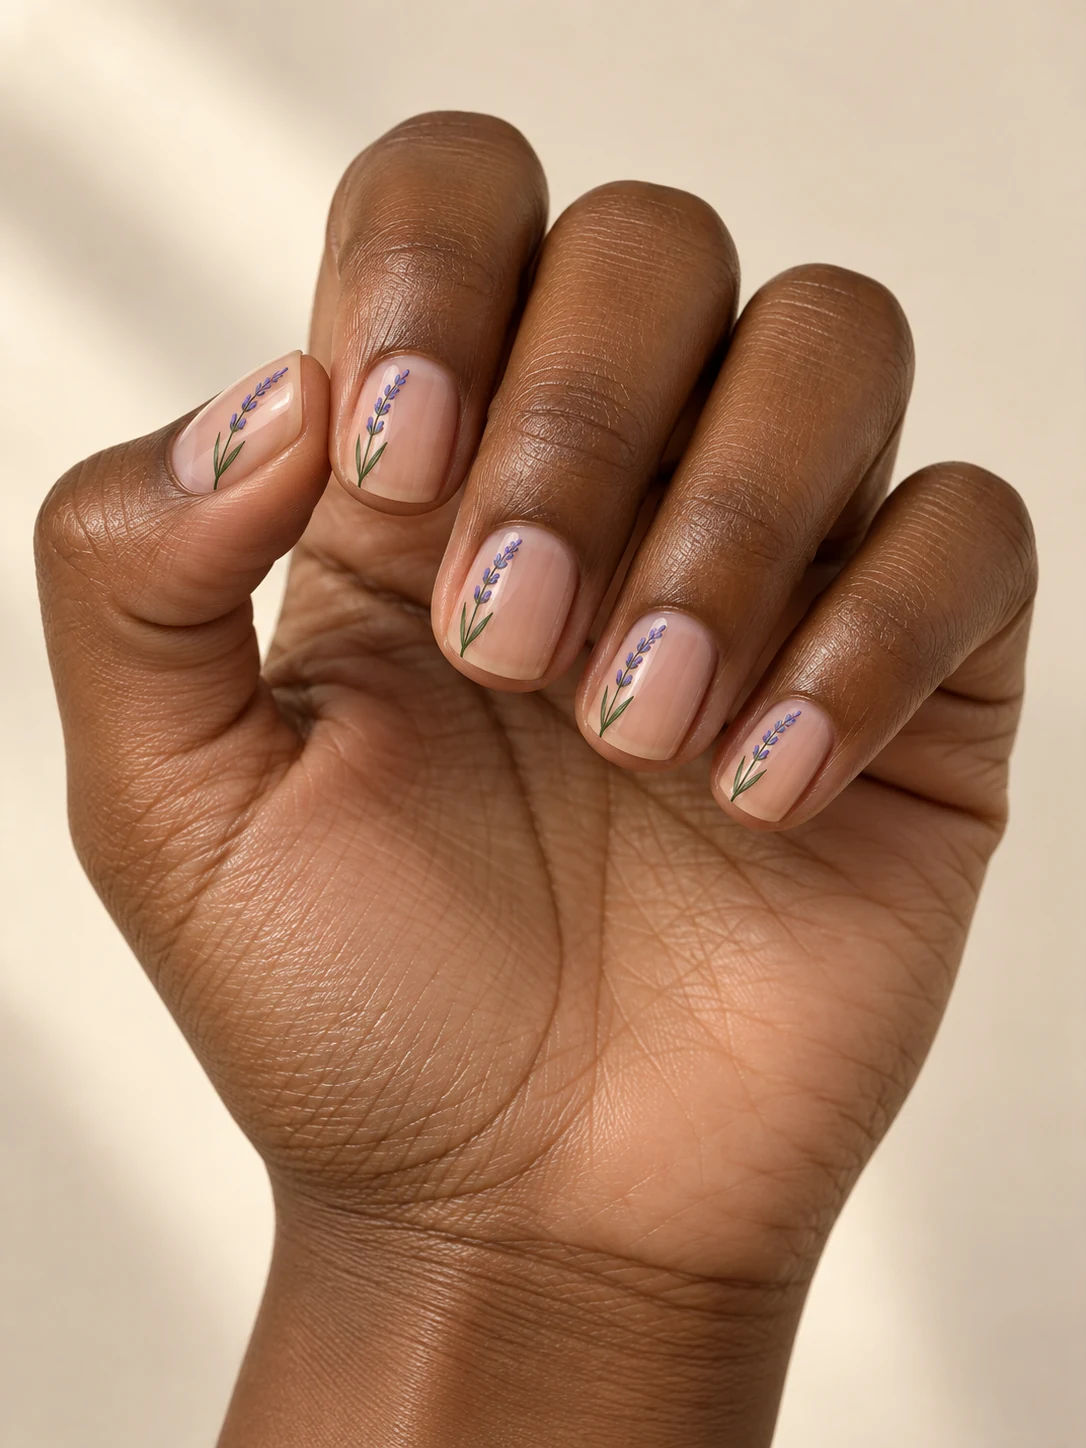
Clear nude short square nails with thin green lavender stems and tiny violet buds placed vertically near one side. Place the thin green stem near one side and add a few violet buds, keeping the opposite half of the nail open. The reference uses short square nails; adapt the proportions to your own nails when planning the look.
Your favorites, saved in this browser.
MAKE IT YOURS
Get This Look
Open your home & salon plan ↗At Salon · How to Ask
- shape
- Square
- length
- Short
- base
- Clear nude short square nails with thin green lavender stems and tiny violet buds placed vertically near one side
- color
- Purple / Green / Nude
- technique
- Floral
- finish
- Compare the finish with the reference
- accents
- Clear nude short square nails with thin green lavender stems and tiny violet buds placed vertically near one side
- complexity
- Detailed finish: discuss method and timing with your nail artist
For your next appointment
I would like short square nails inspired by this reference: clear nude short square nails with thin green lavender stems and tiny violet buds placed vertically near one side. Place the thin green stem near one side and add a few violet buds, keeping the opposite half of the nail open. Please adapt the proportions to my nails, compare color samples and confirm the technique, time and price before starting.
Save the photo and show your nail artist the details.At Home · Do It Yourself
Intermediate · 35–60 minutes, plus drying
Products & tools
- Regular air-dry polish
- Base coat and top coat
- Nail file
- Fine nail-art brush for painted details
- Nail-art dotting tool for small accents
Steps
- Gently shape the free edge; leave the cuticles intact.
- Start with clean, dry nails. Apply base coat according to its label.
- Apply thin coats of your chosen regular polish and let each layer dry.
- On a dry base, draw a thin stem with a fine nail-art brush. Add short paired strokes for leaves or a few small dots for petals using regular polish. Begin with one accent nail; simplify layered flowers to a flat outline rather than attempting sculpted petals.
- Add top coat following its label and allow enough drying time.
Tips
- Place the thin green stem near one side and add a few violet buds, keeping the opposite half of the nail open.
- Lavender at the edge. Use this original concept as a visual reference. The home version uses regular polish and does not reproduce extensions, raised decorations or specialist salon effects.
Before you begin
- Use only regular air-dry polish for this guide. Follow the product labels, ventilate the room and stop if irritation occurs. Do not use damaged or painful nails.
Shop this look
Coming soonWe’re putting together product matches for this manicure. For now, take these details to your nail artist.
- Color direction
- Purple · Green · Nude
- Finish & details
- Floral
- The silhouette
- Short square
KEEP THE INSPIRATION GOING